Showing posts with label Glyph progress. Show all posts

Wednesday, September 8, 2010

Glyph is finished!

Well, almost three and a half years after placing an order for the Glyph ukulele on April 4th, 2007, it is finally completed. Dave has sent me the final set of construction pictures and it is set to ship to me at the end of the week. Woohoo!

When I placed that order in 2007, it was only about 2 months after I played a ukulele for the very first time. I was already well on my way to an out of control UAS wild ride that has seen over 20 (maybe even 30) ukuleles pass through my hands to this day. At the time, I recognized that a custom Glyph was quite a bargain and I figured that by the time the ukulele is complete, I'd be somewhat proficient at playing the instrument to justify a nice uke. Now that I think about it, it was quite a big leap of faith. I mean, I was only 2 months into playing the instrument and ordering the Glyph was basically an instant 3 year commitment to playing it. It turned out that sticking with playing the ukulele was never an issue for me, but I could have easily lost interest during the time between order placement and now. Luckily for me, here we are, I'm still addicted to playing the ukulele, and I'm eagerly awaiting the arrival of this "mini-Jake" ukulele!

Here are the final set of construction pics:

Leveling the frets


Checking the frets with precision straightedges of different lengths


Dressing the fret ends


Gluing on the bridge


Front of the ukulele after stringing up (Notice the wave shaped bridge to go with the wave at the end of the fretboard)


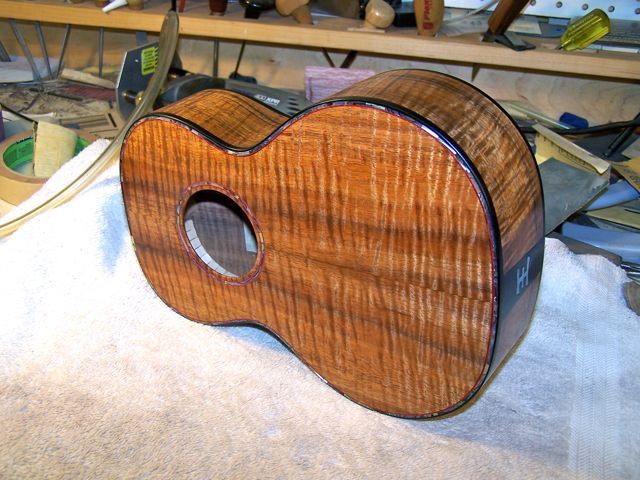
Back of the ukulele after stringing up

Sunday, August 29, 2010

Home stretch for Glyph!

I just got an update from Dave Means last night about my Glyph mezzo-soprano. It sounds like we're a couple of weeks from completion. Things are looking pretty good for my "mini-Jake" ukulele. It's been a while since I've bought a uke, and I can honestly say I haven't felt any UAS for quite a while now, but I'm getting a little excited to finally get my hands on this one. After all, it is three and a half years in the making. I guess I got to get going on getting proficient on a new song so I can post a halfway decent video with it once it arrives.

Anyway, onto the pics:

Fine tuning the fit of the neck to the body


Pressing in the frets


The fretted board


Gluing on the fretboard


Gluing on the headstock overlay


Drilling the holes for the tuner shafts


Cleaning up the headstock slots


Ramping the headstock slots


Test-fitting the neck


The uke after fitting the neck


Close-up of the headstock (the tuners are not screwed in yet)

Saturday, July 24, 2010

Glyph Update!

It's been a while since I've been able to post the progress of my Glyph, but today I received another set of pictures from Dave Means, so I can finally make another post.

Looking at this set of pictures, it dawned on my just how custom this one is going to be. It has the Chinese character of my last name in two places (headstock & tail graft) and my initial on the fretboard. It's safe to say that even if I wanted to sell it someday (which is, of course, not an option!) , I most likely won't be able to. But that's OK, because this ukulele is meant to be a family heirloom anyway.

Dave mentioned that he is starting work on slotted headstock. Once that's done, I think all the parts of the ukulele will be complete. Then it will be onto finishing. Since Dave uses French polish for the finish on his ukes, it will take quite some time before it is done. I guess I'll be lucky to see this uke by the fall. But I'm nothing if not patient. Besides, I've waited over 3 years for this uke, what's another few months?

Anyway, without further ado, here are the pics:

Preparing to rout the binding/purfling ledges


Inlaying the abalone purfling


Spraying the ebony binding with water in preparation for bending


The bindings coming out of the bender


Installing the top bindings


The body after sanding and wiping with one coat of shellac to reveal spots requiring more sanding


Slotting the fretboard


Thicknessing the fretboard


Cutting out the Glyph inlay with a jeweler’s saw


Cutting out the custom inlay for the headstock


Experimenting with positioning the inlays on the ebony headstock overlay


Binding the fretboard


The fretboard after binding


Experimenting with the position of the monogram inlay (I must say, Dave did a great job with this inlay design. I wanted something similar to Jake Shimabukuro's "JS" logo on the fretboard but with my initials and I had no idea what it should look like. I really like what Dave came up with here)


Routing the inlay cavity


Radiusing the fretboard


The fretboard after inlaying the position markers and sanding them flush


Well, that's it for this round of Glyph progress pictures. Looks like my mini-Jake Shimabukuro homage ukulele is now coming along nicely. It will be cool when it is finally completed. When the next round of progress pics show up, I'll be sure to post it right away. Stay tuned! I know I am!

Monday, March 15, 2010

Glyph update II

Dave Means has sent me another batch of build pictures for my Glyph mezzo soprano. Looks like it's coming along pretty good now. I have no idea when it will be completed, but I guess it's done when it's done. Onto the pics!

The finished back.


Roughing out the Spanish cedar neck.


Cutting slot for carbon fiber reinforcement rod.


Gluing the carbon fiber rod and neck attachment barrel nut.


Cutting out the tail graft inlay with a jeweler's saw.


Inlaying the character onto a piece of ebony.

Test fitting the tail graft.


Gluing the back linings.

Roughing out the neck on a band saw.


Sanding the sides and linings on a 12"-radius dish to match the dome of the back.


Routing the rosette channel.


Cutting out the soundhole.


Inlaying the rosette.


Sanding the arch in the bottom of the soundboard braces.


Gluing the soundboard braces & rosewood bridge patch.


Notching the back linings to received the ends of the back braces.


Gluing on the back.


The neck after carving and rough sanding. (note: this will be a slotted headstock)


Profiling the soundboard braces with a finger plane.


Ramping the brace ends with a paring chisel.


The finished soundboard.


Gluing in the top linings.


So that's it for now. Looks like most of the parts are complete or nearing completion. The fretboard will have a Jake Shimabukuro style inlay of my initials and the rough design by Dave looked great to me. This should end up being a pretty cool little uke.
Stay tuned!

Which uke should I bring on my next trip to Oahu???

What's the maximum you'd spend on a ukulele case for your best uke?

If you could steal one of my ukes, which one would it be???

How curly do you like your koa? (preferably on a uke)

What's the maximum number of ukes a perfectly sane person should have???

Poll: How often do you play the ukulele???

Poll: Which guitar company's approach to ukes do you prefer???

Poll: What's your favorite type of headstock???

Poll: The new basic Collings concert uke (UC-1) sells for about $1k, your reaction is: